jiu jitsu gi size guide

Choosing the right Jiu Jitsu Gi is essential for both comfort and performance. This guide helps you navigate size charts, ensuring a perfect fit while meeting IBJJF regulations.

Why Proper Fit Matters in Jiu Jitsu

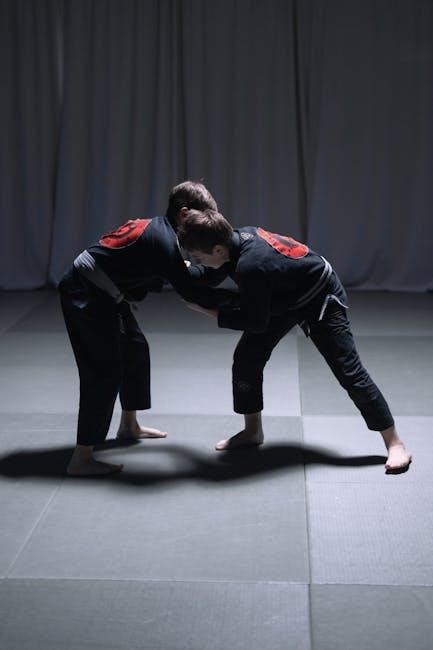
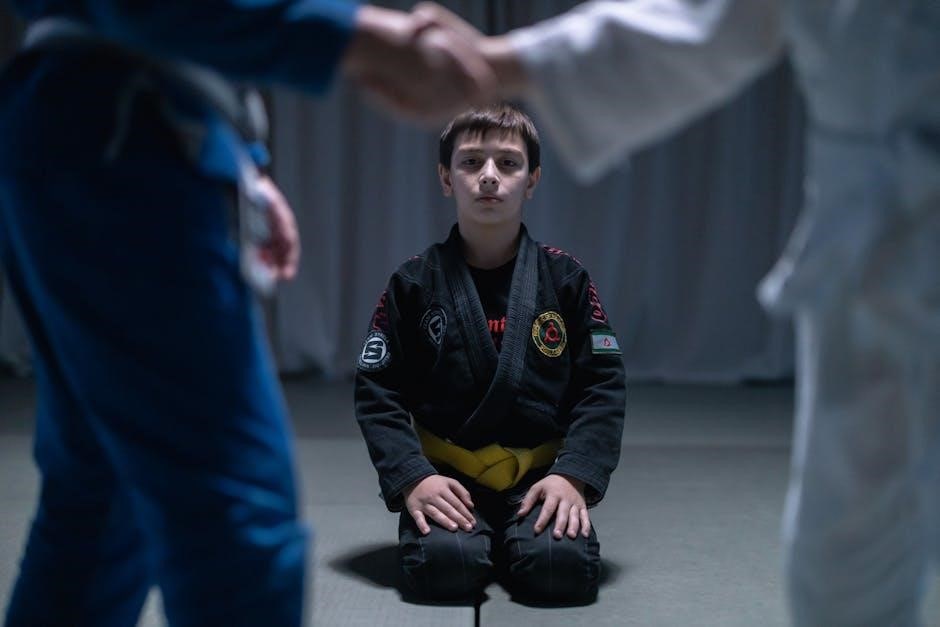
A proper-fitting Jiu Jitsu Gi is crucial for both performance and comfort. A Gi that is too tight can restrict movement, while one that is too loose may be easily grabbed by opponents, giving them an advantage. The fit directly impacts your training efficiency and overall experience on the mats. A well-fitting Gi ensures optimal mobility, allowing you to execute techniques smoothly and focus on improving your skills. Additionally, a Gi that fits correctly reduces the risk of discomfort or chafing during intense rolls. Proper fit also plays a role in durability, as a Gi that is neither too tight nor too loose will experience less stress on the fabric, prolonging its lifespan. Ultimately, the right fit enhances your training, ensuring you can perform at your best without distractions.

Key Considerations for Choosing the Right Gi Size

When selecting a Jiu Jitsu Gi, prioritize your height, weight, and body type. Consider the brand’s sizing chart, fabric type, and weave for comfort and durability. Proper fit ensures optimal performance and compliance with regulations.

Understanding Jiu Jitsu Gi Size Charts

Jiu Jitsu Gi size charts are designed to help practitioners find the perfect fit based on their height, weight, and body type. These charts typically use a combination of letters and numbers, such as A0, A1, A2, etc., to categorize sizes. However, it’s important to note that sizing can vary significantly between brands, as there is no universal standard. Each brand may have its own interpretation of what constitutes a specific size, so it’s crucial to refer to the brand’s specific size chart rather than assuming it aligns with another brand’s measurements. Additionally, some charts may differentiate between adult and youth sizes, further complicating the process. To interpret a size chart accurately, consider your height and weight, but also pay attention to how the brand describes the fit, such as “slim” or “relaxed.” Checking reviews or trying on a gi, if possible, can also help ensure the best fit. Understanding these charts is essential for selecting a gi that meets your needs and preferences, ensuring both comfort and performance on the mats.

The Importance of Height and Weight in Sizing

Height and weight are crucial factors in determining the right Jiu Jitsu Gi size, as they provide a baseline for fit. Most size charts are structured around these measurements, ensuring the gi is neither too tight nor too loose. Proper fit is essential for mobility and comfort during training. While height and weight are primary considerations, body type and brand-specific sizing can also influence the ideal fit. Consulting the brand’s size chart and considering personal fit preferences will help ensure the best choice. Remember, a well-fitting gi enhances performance and comfort, making it vital to use height and weight as foundational guidelines while accounting for individual variations.

How to Determine Your Ideal Gi Size

To determine your ideal Gi size, start by consulting a size chart specific to your brand, using your height and weight as primary guidelines. Consider the Gi’s weave and weight, as these can affect fit and comfort. Ensure the Gi meets IBJJF regulations if you plan to compete. Personal preference for a snug or loose fit is also crucial. Be mindful of fabric shrinkage and whether the Gi is pre-shrunk. Finally, seek advice from experienced practitioners to ensure the best fit for performance and comfort.

Using Your Height and Weight for Sizing

Height and weight are the primary factors in determining your Jiu Jitsu Gi size. Most brands use a size chart that correlates height and weight with specific sizes. Start by measuring your height and weight accurately, then match these to the size chart. Pay attention to the letter-and-number system (e.g., A0, A1, A2), which varies by brand. While height and weight are key, personal fit preference also matters. Some prefer a snug fit for competition, while others opt for a looser feel. Consider fabric shrinkage, as some Gi fabrics may shrink after washing. Always refer to the brand’s specific size chart, as sizing can differ significantly between manufacturers. For the best fit, combine height and weight measurements with personal comfort and training needs. If unsure, consult multiple sources or seek advice from experienced practitioners.

Navigating Brand-Specific Size Differences

One of the most challenging aspects of choosing a Jiu Jitsu Gi is navigating the size differences between brands. Each brand has its own sizing chart, and sizes can vary significantly. For example, a size A2 in one brand may fit entirely differently than a size A2 in another. This variation occurs because brands cater to different body types, preferences, and training needs. Some brands offer slim cuts, while others provide more traditional or relaxed fits. Additionally, fabric type and weight can influence how a Gi fits, even within the same size. To overcome this, always refer to the specific brand’s size chart and consider reading reviews or asking for recommendations from practitioners who share your body type. Cross-referencing measurements and trying on Gis before buying, if possible, can also help ensure the best fit. Remember, consistency in sizing is not guaranteed across brands, so flexibility and research are key.

Additional Factors to Keep in Mind

Consider fabric type, weave, and weight, as they impact durability and comfort. Shrinkage and IBJJF legal requirements are also crucial for competition and training purposes.

Gi Weave, Weight, and Fabric Types

The weave, weight, and fabric of a Jiu Jitsu Gi significantly impact comfort, durability, and performance. Common weaves include single, double, and gold, with single being lightweight and breathable, while double is heavier and more durable. Fabric types vary, with cotton being the most common, but some gis may blend materials for enhanced properties. Lightweight gis are ideal for hot weather and competitions, while heavyweight gis offer superior strength and longevity. The choice of fabric and weave should align with your training frequency, climate, and personal preference. Additionally, some gis feature pre-shrunk fabrics to minimize size changes after washing. Understanding these factors helps in selecting a gi that balances performance, comfort, and durability, ensuring optimal training sessions. Always consider these elements alongside size charts for the best fit.

IBJJF Regulations and Legal Requirements

When selecting a Jiu Jitsu Gi, it’s crucial to ensure it meets IBJJF regulations for competitions. The International Brazilian Jiu-Jitsu Federation sets strict guidelines regarding size, material, and design. Gis must be made of cotton or a cotton-polyester blend, with no metallic or plastic parts. The sleeves and pants must meet specific length requirements, and the belt must have a minimum width. Additionally, the Gi must be free of excessive wear and tear, with no frayed edges or holes. Proper fit is also essential, as overly loose or tight Gis can be disqualified. Checking the IBJJF certification ensures compliance, allowing athletes to compete without issues. Always verify the regulations before purchasing, especially if competition is a goal, to avoid disqualification and ensure a smooth tournament experience.

By following this guide, you’ll confidently find a Jiu Jitsu Gi that fits perfectly, meets IBJJF regulations, and enhances your training experience. Happy rolling!

Final Tips for Finding the Perfect Fit

Finding the perfect Jiu Jitsu Gi fit requires careful consideration of your height, weight, and personal comfort preferences. Always start by consulting the brand’s size chart and comparing it to your measurements. If possible, try the Gi on before purchasing to ensure a snug yet comfortable fit. Pay attention to sleeve and pant lengths, as these can vary between brands. Consider reading reviews or asking fellow practitioners for recommendations, especially if you’re unsure about sizing. Remember, a well-fitting Gi not only enhances performance but also ensures compliance with IBJJF regulations. Don’t hesitate to reach out to the manufacturer if you’re still unsure, as they often provide guidance. Ultimately, the right fit will make your training more enjoyable and effective, so take the time to get it just right.

intex pool ladder instructions

Welcome to the comprehensive guide for Intex pool ladder instructions․ This guide covers assembly‚ installation‚ safety‚ and maintenance for various Intex pool ladder models‚ ensuring safe and enjoyable use․

1․1 Overview of Intex Pool Ladder Models

Intex offers a variety of pool ladder models designed for above-ground pools‚ including 3-step and 4-step options․ Models like the Intex 52 and 48 are tailored for pools with 48-inch to 52-inch wall heights․ These ladders feature removable steps‚ corrosion-resistant coatings‚ and adjustable designs for compatibility and safety․ They are easy to assemble and designed to meet diverse pool needs․

1․2 Importance of Following Safety Guidelines

Following safety guidelines is crucial to ensure safe entry and exit from your Intex pool․ Proper setup and regular inspections prevent accidents‚ while securing the ladder when not in use avoids unauthorized access․ Adhering to weight limits and manufacturer recommendations ensures stability and longevity‚ making it essential for a safe and enjoyable swimming experience for all users․

Safety Guidelines for Intex Pool Ladder

Always secure the ladder when not in use and ensure it is stable before climbing․ Regularly inspect all parts for damage or wear‚ and follow the manufacturer’s instructions to ensure safe usage and prevent accidents․

2․1 General Safety Precautions

Always secure the ladder when not in use to prevent unauthorized access․ Regularly inspect for damage or wear and ensure all parts are tightly secured․ Avoid swimming under or behind the ladder‚ and never exceed the weight limit․ Ensure the ladder is placed on a level‚ stable surface and follows the manufacturer’s guidelines for safe installation and usage to minimize risks of accidents or injuries․

2․2 Weight and Usage Limitations

Intex pool ladders are designed with specific weight capacities to ensure safe usage․ Always adhere to the recommended weight limits to avoid instability․ The ladder is suitable for pools with 48″ or 52″ wall heights and features removable steps for added convenience․ Exceeding the weight limit can lead to structural compromise‚ so ensure all users are aware of and comply with the specified guidelines to maintain safety and durability․

Assembly Instructions for Intex Pool Ladder

Unpacking and organizing all parts is essential․ Follow the manual for step-by-step assembly‚ ensuring proper alignment and secure connections․ No tools are required for most models․

3․1 Unpacking and Identifying Parts

Begin by carefully unpacking the ladder components‚ including steps‚ side rails‚ and hardware․ Organize all parts to avoid confusion․ Refer to the manual for a detailed parts list․ Ensure all items are included and undamaged before proceeding․ This step is crucial for a smooth assembly process․ Cross-reference each part with the manual to confirm accuracy․ Store small hardware in a container to prevent loss․ Proper identification ensures a successful assembly experience․ Always follow the manufacturer’s guidance for optimal results․

3․2 Step-by-Step Assembly Process

Start by attaching the steps to the side rails‚ ensuring proper alignment and secure connections․ Follow the manual for specific bolt placements․ Next‚ assemble the ladder frame by connecting the side rails and base․ Tighten all hardware firmly․ Double-check all connections for stability․ Finally‚ test the ladder by applying weight gradually․ Refer to the manual for model-specific instructions․ Ensure all steps are completed carefully for safe use․

Installation of the Intex Pool Ladder

Place the ladder on a level‚ solid base to ensure stability․ Secure it to the pool using the provided hardware․ Adjust the height as needed for proper alignment․ Ensure the ladder is firmly attached to prevent shifting․ Double-check all connections for safety before use․

4․1 Positioning the Ladder on a Level Surface

Ensure the ladder is placed on a flat‚ even surface to maintain stability․ Check the area for levelness and adjust as needed․ Use a spirit level to confirm accuracy․ Position the ladder securely‚ ensuring its base is firmly grounded․ Avoid uneven or soft surfaces that could cause instability․ Regularly inspect the ladder’s placement to ensure safety and proper alignment with the pool․ Detach steps when not in use for added security․

4․2 Securing the Ladder to the Pool

Secure the ladder to the pool using the provided hardware to prevent shifting or detachment․ Tighten all bolts and nuts firmly according to the manufacturer’s instructions․ Ensure the ladder is stable and evenly balanced․ For 48-inch and 52-inch pool models‚ attach the ladder to the pool frame or decking as specified․ Regularly inspect the connections to maintain safety and stability․

Maintenance and Upkeep of the Ladder

Regular maintenance ensures longevity and safety․ Clean the ladder frequently‚ lubricate moving parts‚ and inspect for damage․ Addressing issues promptly prevents rust and instability‚ ensuring reliable performance․

5․1 Cleaning the Ladder

Regular cleaning is essential for maintaining the ladder’s condition․ Remove the ladder from the pool and wash it with mild detergent and water․ Use a soft brush to scrub away dirt and grime․ Avoid using harsh chemicals or abrasive materials that may damage the finish․ Rinse thoroughly and dry to prevent mineral spots․ Regular cleaning prevents corrosion and ensures a safe‚ sturdy ladder for years․

5․2 Lubricating Moving Parts

Lubricate the ladder’s moving parts‚ such as hinges and bolts‚ to ensure smooth operation and prevent corrosion․ Use a silicone-based spray lubricant‚ avoiding oil-based products that may attract dirt․ Apply the lubricant after cleaning and wipe off any excess with a cloth․ Regular lubrication helps maintain stability and extends the ladder’s lifespan‚ ensuring safe and efficient use throughout the pool season․

Troubleshooting Common Issues

This section addresses common problems like ladder instability or corrosion‚ offering practical solutions to ensure your Intex pool ladder remains safe and functional for years․

6․1 Addressing Ladder Instability

If your Intex pool ladder feels unstable‚ check that all nuts and bolts are tightened securely․ Ensure the ladder is placed on a level surface and consider using anti-slip pads for added stability․ If instability persists‚ inspect for damage or wear and adjust the ladder’s positioning to maintain balance․ Regular maintenance can prevent such issues․

6․2 Fixing Corrosion or Rust

To address corrosion or rust on your Intex pool ladder‚ start by sanding the affected areas to remove rust․ Apply a rust inhibitor or waterproof coating to prevent further damage․ Ensure all metal parts are clean and dry before reassembly․ Regularly inspect and maintain the ladder‚ especially after winter storage‚ to avoid corrosion issues and ensure long-term durability․

Storage and Winterization

Store the Intex pool ladder in a dry‚ protected area during off-season․ Remove and clean it before storage to prevent damage․ Ensure all parts are secure․

7․1 Removing and Storing the Ladder

To store the Intex pool ladder‚ first remove it from the pool and clean it thoroughly․ Detach any removable steps and store them separately․ Ensure all parts are dry to prevent rust․ Store the ladder in a protected‚ dry area away from direct sunlight and harsh weather conditions․ This ensures longevity and safe reuse next season․

7․2 Preparing for Off-Season Storage

For off-season storage‚ clean the ladder thoroughly and ensure it is completely dry to prevent rust or corrosion․ Apply a protective coating to metal parts if needed․ Store the ladder in a cool‚ dry place away from direct sunlight and moisture․ Check for any damage or wear and make repairs before storing to ensure it remains in good condition for the next season․

Accessories for Intex Pool Ladders

Intex offers various accessories‚ such as additional steps‚ handrails‚ and protective coatings‚ to enhance ladder functionality‚ safety‚ and durability for different pool models․

8․1 Available Accessories

Intex offers a range of accessories to enhance your pool ladder experience‚ including removable steps‚ protective coatings‚ and sturdy handrails․ These accessories ensure compatibility with various Intex pool ladder models‚ improving safety‚ durability‚ and user convenience․ They are designed to fit seamlessly with your existing setup‚ providing added functionality and peace of mind for pool owners․

8․2 Compatibility with Different Models

Intex pool ladder accessories are designed to be compatible with various models‚ including the 48-inch and 52-inch wall height pools; Whether you have an Easy Set‚ Ultra Frame‚ or Metal Frame pool‚ these accessories ensure a perfect fit and enhanced functionality․ Compatibility is key‚ allowing you to customize your pool setup without compromising safety or performance․

Compliance with Pool Safety Standards

Intex pool ladders are built to meet rigorous safety standards‚ including local and international regulations‚ ensuring durability and reliability for safe pool entry and exit․

9․1 Meeting Local and International Safety Regulations

Intex pool ladders are designed to comply with both local and international safety standards‚ ensuring maximum reliability and user protection․ They feature corrosion-resistant materials‚ secure step-locking systems‚ and sturdy frames․ By adhering to these regulations‚ Intex ladders provide a safe and durable solution for pool access‚ meeting the expectations of global safety certifications and customer needs․

9․2 Certifications and Warranty Information

Intex pool ladders are backed by certifications from recognized safety standards like ISO and ASTM‚ ensuring reliability and compliance․ Each ladder comes with a limited 1-year warranty covering manufacturing defects in materials and workmanship․ For warranty validity‚ proper registration and adherence to usage guidelines are required․ Intex stands behind its products‚ offering support for defects and ensuring customer satisfaction through durable‚ high-quality construction․

User Responsibilities

Users must ensure regular inspection of the ladder‚ proper usage‚ and adherence to safety guidelines․ Always remove the ladder when the pool is unattended for safety․

10․1 Regular Inspection Requirements

Regular inspections are crucial for ensuring the ladder’s safety and durability․ Check all nuts‚ bolts‚ and moving parts for tightness and wear․ Inspect the steps and handrails for damage or corrosion․ Ensure the ladder base is stable and level․ Look for signs of rust or deterioration‚ especially in metal components․ Replace any damaged parts immediately to maintain structural integrity․

  • Inspect steps and handrails for damage or wear․
  • Check nuts and bolts for tightness․
  • Ensure the ladder base is stable and level․
  • Look for signs of rust or corrosion․

10․2 Reporting Defects or Damages

Regularly inspect your Intex pool ladder for defects or damage․ If you find any issues‚ document them with photos or descriptions․ Contact Intex customer support immediately to report the problem․ Do not use the ladder until it is repaired or replaced․ Prompt action ensures safety and prevents further damage․

  • Inspect the ladder regularly for signs of wear or damage․
  • Document any defects with photos or detailed descriptions․
  • Contact Intex customer support promptly to report issues․
  • Avoid using the ladder until repairs or replacements are made․

Environmental Considerations

Intex prioritizes eco-friendly materials and sustainable practices․ Proper disposal of old ladders and recycling materials support environmental conservation․ Always follow local guidelines for responsible waste management․

  • Eco-friendly materials used in production․
  • Recycle or dispose of old ladders responsibly․

11․1 Eco-Friendly Materials Used

Intex pool ladders are crafted using eco-friendly materials‚ ensuring durability and sustainability․ The coated steel frames resist corrosion while minimizing environmental impact․ Removable steps and adjustable features enhance longevity‚ reducing waste․ These materials are chosen to support long-term environmental conservation and responsible resource use․

  • Coated steel frames for corrosion resistance․
  • Removable steps to reduce material waste․
  • Adjustable designs for extended product lifespan․

11․2 Proper Disposal of Old Ladders

Properly dispose of old Intex pool ladders to minimize environmental impact․ Disassemble the ladder and separate materials like metal and plastic for recycling․ Check local regulations for hazardous waste guidelines․ Ensure all components are handled responsibly to prevent environmental harm․ Consider donating usable parts or recycling through authorized facilities․

  • Disassemble the ladder for material separation․
  • Recycle metal parts to reduce waste․
  • Follow local regulations for safe disposal․

Following Intex pool ladder instructions ensures safety‚ proper assembly‚ and maintenance․ Always prioritize guidelines to enjoy a secure and enjoyable swimming experience with your Intex pool ladder․

12․1 Summary of Key Points

Intex pool ladders are designed for safety and durability‚ available in 48″ and 52″ models․ They feature removable steps‚ easy assembly‚ and rust-resistant frames․ Always follow assembly‚ safety‚ and maintenance guidelines to ensure longevity and secure pool access․ Regular inspections and proper storage are essential for optimal performance and user safety․ Eco-friendly materials are used‚ and proper disposal is recommended for old ladders․

12․2 Final Safety Reminders

Always prioritize safety when using your Intex pool ladder․ Ensure the ladder is stable and secure before use․ Regularly inspect for damage or corrosion․ Keep the area around the ladder clean and clear of obstacles․ Supervise children and ensure users follow weight limits․ Never swim under or behind the ladder․ Store the ladder securely when not in use to prevent accidents and adhere to all local safety regulations․

manual transmission service

Manual transmissions require specialized care to ensure optimal performance and longevity. Regular servicing involves inspecting key components, addressing common issues, and maintaining proper fluid levels to prevent mechanical failure.

Key Components of a Manual Transmission

A manual transmission consists of essential parts, including gears, bearings, the clutch system, and transmission fluid, all working together to facilitate smooth power transfer from the engine to the wheels.

2.1. Gears and Gearbox

The gearbox houses the gears, which are critical for speed adjustment. Synchronized gears mesh to provide smooth transitions between speeds, while bearings support moving parts to reduce friction and wear.

2.2. Clutch System

The clutch system connects and disconnects the engine from the transmission, enabling smooth gear shifts. It includes the clutch disc, pressure plate, and release bearing, all working in harmony to prevent engine stalling during gear transitions.

2.3. Transmission Fluid

Transmission fluid is essential for lubricating gears and maintaining smooth operation. While many manual transmissions use specific oils, some may require automatic transmission fluid or heavyweight hypoid gear oil, depending on the manufacturer’s specifications.

Common Issues in Manual Transmissions

Manual transmissions often experience issues like grinding gears, slipping gears, and difficulty shifting, which can result from worn components or improper clutch engagement. These problems can lead to costly repairs if not addressed promptly.

3.1. Grinding Gears

Grinding gears is a common issue in manual transmissions, often caused by improper clutch engagement or synchronizer wear. When gears grind, it indicates poor alignment during shifting, which can damage gear teeth and bearings if not resolved. This problem is frequently due to driver error, such as riding the clutch or shifting too quickly. Over time, grinding can lead to increased wear on transmission components, necessitating costly repairs. Regular maintenance, including clutch adjustments and fluid checks, can help prevent this issue. Additionally, ensuring the clutch pedal is fully disengaged before shifting can reduce the likelihood of grinding gears, prolonging the life of the transmission. Early detection and correction are crucial to avoid further damage.

3.2. Slipping Gears

Gear slipping is a concerning issue where gears fail to stay in place during operation, leading to unexpected shifts or loss of power. This problem is often linked to worn synchronizers, damaged gear teeth, or low transmission fluid levels. Over time, excessive wear on these components can cause gears to slip, especially when accelerating or decelerating. If left unaddressed, slipping gears can result in complete transmission failure, requiring extensive and costly repairs. Regular fluid checks and inspections can help identify early signs of wear, allowing for timely interventions. Ensuring the transmission is properly maintained and addressing any issues promptly are essential to prevent gear slipping and maintain smooth, reliable performance. Early detection and professional servicing are key to avoiding further complications and extending the lifespan of the manual transmission system.

3.3. Difficulty Shifting

Difficulty shifting gears is a common issue in manual transmissions, often caused by problems with the clutch system or synchronization. If the clutch fails to engage or disengage properly, shifting becomes challenging, especially when accelerating or decelerating. Additionally, low or dirty transmission fluid can impair gear engagement, leading to stiff or unresponsive shifting. Misaligned or damaged gear linkages or cables can also prevent smooth transitions between gears. Over time, worn-out synchronizers or gear teeth can exacerbate the problem, making it harder to shift into higher gears. Addressing these issues promptly is crucial, as prolonged difficulty can lead to further damage. Regular inspections and maintenance, including clutch adjustments and fluid checks, can help prevent shifting problems and ensure a smoother driving experience. Professional servicing is often necessary to diagnose and repair underlying causes effectively.

Maintenance Tips for Manual Transmissions

Regular inspections, fluid checks, and clutch adjustments are essential for maintaining manual transmissions. These practices help prevent wear, reduce repair costs, and ensure smooth gear operation over time.

4.1. Regular Inspection

Regular inspection is crucial for maintaining the health of a manual transmission. It involves checking the gearbox, clutch system, and transmission fluid for signs of wear or contamination. During an inspection, a mechanic will typically examine the gear teeth for damage, ensure proper clutch alignment, and look for any leaks in the system. Additionally, the transmission fluid level and condition should be assessed. If the fluid appears dirty or low, it may need to be replaced. Early detection of issues through regular inspections can prevent costly repairs and ensure the transmission operates smoothly. By addressing problems before they escalate, drivers can extend the lifespan of their manual transmission and maintain optimal performance.

4.2. Fluid Replacement Intervals

Fluid replacement is essential for maintaining the functionality of a manual transmission. The intervals for changing transmission fluid vary depending on the vehicle manufacturer’s recommendations, typically ranging from 30,000 to 60,000 miles. Some manuals require automatic transmission fluid, while others need specific manual transmission oil or hypoid gear oil. Neglecting to replace the fluid can lead to gear damage, sludge buildup, and reduced performance. It’s important to consult the vehicle’s manual or a professional to determine the correct fluid type and schedule. Regular fluid changes ensure gears remain lubricated, preventing premature wear and tear. Proper maintenance can significantly extend the transmission’s lifespan and prevent costly repairs down the road.

4.3. Clutch Maintenance

Clutch maintenance is vital for smooth gear transitions in a manual transmission. Drivers should avoid riding the clutch, as this can cause excessive wear on the clutch disc and pressure plate. Regular inspection of the clutch system, including the release bearing and hydraulic components, is recommended. If the clutch exhibits signs of wear, such as slipping or difficulty engaging gears, it should be replaced promptly. Additionally, ensuring proper alignment of the clutch components during installation prevents uneven wear. Lubricating the clutch release bearing and pivot points can also extend its lifespan. Proper driving habits and timely repairs are key to maintaining clutch performance and overall transmission health.

Cost of Manual Transmission Service

Manual transmission repair costs vary based on the type and extent of service, ranging from fluid changes to complete overhauls, influenced by labor rates and parts quality.

5.1. Factors Affecting Cost

The cost of manual transmission service is influenced by several factors, including the type of service required, the make and model of the vehicle, and the labor rates of the service provider. Additionally, the availability and cost of replacement parts, such as gears, bearings, and clutch components, can significantly impact the total expense. In some cases, the transmission fluid used may also vary in price depending on the manufacturer’s recommendations. DIY repairs can save on labor costs, but they often require specialized tools and knowledge, which may add to the overall expense. Professional services, on the other hand, offer expertise and warranties but come at a higher cost due to labor fees. Understanding these factors helps in planning and budgeting for manual transmission maintenance effectively.

5.2. Average Cost of Repairs

The average cost of manual transmission repairs varies widely depending on the severity of the issue. Basic services, such as fluid changes or minor adjustments, typically range from $50 to $200. However, more extensive repairs, like replacing worn-out gears or bearings, can cost between $500 to $2,000 or more. Complete transmission overhauls, where the unit is disassembled and rebuilt, often fall between $1,500 to $3,500, depending on the vehicle and labor rates. In extreme cases, such as a failed transmission requiring replacement, the cost can exceed $4,000, especially if a new unit is installed. Additionally, clutch replacements, which are common in manual transmissions, can add another $500 to $1,500 to the total cost. It’s important to consult a professional for an accurate estimate tailored to the specific issue.

5.3. DIY vs Professional Service

When it comes to manual transmission service, the decision between DIY and professional service depends on skill level and resources. DIY repairs can save money but require mechanical expertise and specialized tools. Improper repairs can lead to further damage, costing more in the long run. Professional services, while more expensive, offer expertise, proper equipment, and warranties for peace of mind. For complex issues like gear replacements or clutch overhauls, professionals are highly recommended. However, routine maintenance tasks, such as fluid changes or inspections, can be handled by knowledgeable DIYers. Balancing cost, convenience, and reliability is key to choosing the right approach for manual transmission care.

Regular maintenance and proper servicing are crucial for extending the life of a manual transmission. Balancing DIY repairs with professional services, based on one’s mechanical expertise, ensures optimal performance and prevents costly repairs. Adhering to recommended practices, such as using the correct transmission fluid and performing timely inspections, guarantees smoother operation and longevity. By prioritizing these practices, car enthusiasts can enjoy the precision and control of their manual transmissions for years to come, experiencing the satisfaction of a well-maintained vehicle.

astm c33 pdf

ASTM C33 is a standard specification for concrete aggregates‚ published by ASTM International. It outlines requirements for fine and coarse aggregates used in concrete construction‚ ensuring materials meet specific grading and quality standards to guarantee optimal performance and durability in construction projects.

1.1 Overview of ASTM C33 Standard

ASTM C33 is a widely recognized standard specification that outlines the requirements for concrete aggregates‚ including both fine and coarse materials. It provides detailed criteria for the grading‚ quality‚ and testing of aggregates to ensure they meet the necessary standards for use in concrete construction. The standard covers aspects such as nominal maximum size‚ bulk density‚ organic impurities‚ and other physical properties critical to concrete performance. ASTM C33 is published by ASTM International and is regularly updated to reflect advancements in materials science and construction practices. This document serves as a foundational guide for contractors‚ engineers‚ and suppliers to select and utilize aggregates that promote durability and strength in concrete structures. It is a key reference for ensuring compliance with industry standards in construction projects.

1.2 Importance of ASTM C33 in Concrete Construction

ASTM C33 plays a vital role in ensuring the quality and performance of concrete in construction projects. By establishing clear specifications for aggregates‚ it helps maintain consistency and reliability in concrete production. The standard ensures that aggregates meet critical requirements for strength‚ durability‚ and workability‚ directly impacting the longevity and safety of structures; Non-compliant aggregates can lead to structural failures‚ costly repairs‚ and delays. ASTM C33 serves as a guiding document for contractors‚ engineers‚ and suppliers‚ enabling them to select and use materials that meet industry standards. Its guidelines are essential for achieving optimal concrete performance‚ making it a cornerstone of modern construction practices worldwide.

Scope and Classification of Concrete Aggregates

ASTM C33 defines the requirements for fine and coarse aggregates used in concrete‚ focusing on their properties‚ such as size‚ shape‚ and density‚ to ensure suitability for construction.

2.1 Definition and Types of Aggregates

Aggregates‚ as defined by ASTM C33‚ are granular materials such as sand‚ gravel‚ crushed stone‚ and slag‚ used in concrete. They are classified into fine aggregates (passing No. 4 sieve) and coarse aggregates (retained on No. 4 sieve). Fine aggregates‚ like natural sand‚ improve workability‚ while coarse aggregates‚ such as crushed stone‚ enhance strength and durability. ASTM C33 also addresses lightweight and heavyweight aggregates for specialized applications. The standard emphasizes the importance of aggregate type and source in achieving desired concrete properties‚ ensuring materials meet specified grading and quality requirements for optimal performance in construction projects.

2.2 Grading Requirements for Fine and Coarse Aggregates

ASTM C33 specifies grading requirements for fine and coarse aggregates to ensure proper concrete mix consistency. Fine aggregates must pass the No. 4 sieve‚ with strict limits on particle size distribution to maintain workability. Coarse aggregates‚ retained on the No. 4 sieve‚ must meet size and gradation criteria to ensure strength and durability. The standard provides detailed sieve analysis limits for both types‚ preventing excessive fines or oversized particles that could compromise concrete performance. Proper grading ensures optimal packing‚ reduces voids‚ and improves concrete’s overall strength and durability. Compliance with these requirements is critical for achieving consistent and reliable concrete properties in construction projects.

Key Requirements for Concrete Aggregates

ASTM C33 outlines essential requirements for concrete aggregates‚ including material quality‚ gradation‚ and physical properties. It ensures aggregates meet standards for strength‚ durability‚ and performance in concrete applications.

3.1 Physical Properties of Aggregates

ASTM C33 specifies essential physical properties of aggregates‚ including gradation‚ bulk density‚ specific gravity‚ and absorption. These properties ensure aggregates are suitable for concrete‚ providing strength and durability. Gradation requirements prevent excessive fines or oversized particles‚ optimizing mix workability. Bulk density and specific gravity indicate aggregate weight and porosity‚ affecting concrete density. Absorption capacity is crucial for determining water-cement ratios‚ ensuring proper hydration. Compliance with these standards guarantees aggregates contribute to durable‚ long-lasting concrete structures‚ essential for construction quality and safety. Proper physical properties are vital for achieving desired concrete performance and meeting project specifications. This section outlines the critical physical attributes aggregates must possess to ensure reliable concrete production. Adherence to these requirements is fundamental for successful construction outcomes.

3.2 Chemical Requirements and Limits

ASTM C33 establishes chemical limits for aggregates to prevent adverse reactions in concrete. Key parameters include organic impurities‚ chloride content‚ and sulfate levels. Organic impurities are tested using the colorimetric test‚ ensuring materials won’t compromise cement hydration. Chloride limits are set to prevent corrosion of embedded steel‚ crucial for structural integrity. Sulfate restrictions mitigate expansion risks that could lead to concrete degradation. Additionally‚ the standard addresses alkali-aggregate reactivity to avoid harmful expansion. These chemical requirements ensure compatibility with cement and other concrete components‚ safeguarding long-term durability. Non-compliance can lead to structural failures‚ emphasizing the importance of adhering to these limits. Regular testing is essential to verify chemical properties and maintain concrete quality. This section provides clear guidelines to avoid potential chemical-related issues in concrete construction. Proper chemical composition is vital for ensuring the longevity and performance of concrete structures. Adhering to these limits is essential for achieving reliable and sustainable construction outcomes.

Testing Methods for Concrete Aggregates

ASTM C33 specifies test methods for evaluating aggregate properties‚ including sieve analysis for grading‚ bulk density‚ and tests for organic impurities. These methods ensure compliance with quality standards.

4.1 Standard Test Methods for Aggregate Properties

ASTM C33 outlines standard test methods to evaluate the physical and chemical properties of concrete aggregates. These include sieve analysis for grading‚ bulk density measurement‚ and tests for organic impurities‚ soundness‚ and abrasion resistance. The tests ensure aggregates meet specified requirements for use in concrete construction. Other methods assess properties like moisture content and clay lumps‚ which can affect concrete performance. These standardized procedures provide consistent and reliable data to verify the quality and suitability of aggregates for various construction applications‚ ensuring durability and strength in the final concrete product.

4.2 Sampling and Testing Procedures

ASTM C33 provides detailed procedures for sampling and testing concrete aggregates to ensure compliance with specified requirements. Sampling methods involve collecting representative aggregate samples at regular intervals during production or delivery. These samples undergo rigorous testing‚ including sieve analysis‚ specific gravity determination‚ and moisture content measurement. The standard also outlines procedures for documenting test results and ensuring accuracy. Proper sampling and testing are critical to verify the quality and consistency of aggregates‚ preventing defects in concrete. Non-compliant materials can lead to structural issues‚ emphasizing the importance of adhering to ASTM C33 guidelines. These procedures ensure reliable data‚ supporting the production of durable and high-performance concrete structures.

Significance of ASTM C33 in Construction

ASTM C33 ensures aggregates meet strict quality and grading standards‚ directly impacting concrete strength‚ durability‚ and structural integrity. Compliance prevents defects‚ ensuring safe and long-lasting construction projects.

5.1 Role of Aggregates in Concrete Strength and Durability

Aggregates play a crucial role in determining the strength and durability of concrete. According to ASTM C33‚ they occupy 70-80% of concrete’s volume‚ significantly influencing its compressive strength. The standard ensures that fine and coarse aggregates meet specific grading and quality requirements‚ which are essential for achieving optimal concrete performance. Properly graded aggregates prevent excessive void spaces‚ improving concrete’s overall density and resistance to environmental factors. Additionally‚ ASTM C33 addresses properties like soundness and abrasion resistance‚ ensuring aggregates can withstand harsh conditions without degrading. This directly contributes to the longevity and reliability of concrete structures‚ making compliant aggregates indispensable in construction.

5;2 Impact of Non-Compliant Aggregates on Construction Projects

Using non-compliant aggregates can severely compromise the quality and safety of construction projects. Aggregates that do not meet ASTM C33 standards may lead to reduced concrete strength‚ durability‚ and structural integrity. This can result in premature deterioration‚ increased maintenance costs‚ and potential safety hazards. Non-compliant materials often fail to withstand environmental stresses‚ such as freeze-thaw cycles or chemical exposure‚ leading to cracking and degradation. Additionally‚ such aggregates can cause inconsistent concrete workability‚ delaying project timelines and increasing expenses. The long-term consequences include diminished public trust in the project and potential legal liabilities. Ensuring compliance with ASTM C33 is critical to avoiding these risks and delivering reliable‚ long-lasting structures.

Availability and Access to ASTM C33 PDF

The ASTM C33 standard is available in PDF format from the official ASTM website‚ ensuring easy access to its updated specifications and requirements for concrete aggregates.

6.1 Official Sources for ASTM C33 Standard

The official sources for the ASTM C33 standard include the ASTM International website‚ where the standard is available for purchase and download in PDF format. Other authorized platforms‚ such as Scribd and the American Concrete Institute‚ also provide access to the document. These sources ensure that users obtain the most up-to-date and accurate version of the standard. Additionally‚ the ASTM C33 standard can be accessed through subscription-based services or by purchasing a single-user license. The PDF format allows for easy reference and compliance with the specified requirements for concrete aggregates. Users are encouraged to verify the authenticity of the document by obtaining it from these official channels to avoid unauthorized or outdated versions.

6.2 Updates and Revisions to the Standard

ASTM C33 undergoes periodic revisions to reflect advancements in concrete technology and industry practices. These updates ensure the standard remains relevant and aligns with current material requirements. Revisions are typically detailed in supplementary documents or revision summaries available on the ASTM website. Users are encouraged to refer to the latest version of the standard to ensure compliance and optimal performance of concrete aggregates. Updates may include changes to grading requirements‚ test methods‚ or the inclusion of new materials. Staying informed about these revisions is crucial for contractors‚ suppliers‚ and engineers to maintain high-quality concrete construction. The ASTM website provides access to the most recent updates and revision histories for the C33 standard.

Posted in PDF

asda staff double discount dates 2023 pdf

Asda’s staff discount scheme offers exclusive savings, including a 15% discount and special double discount events in 2023. Key dates include November 18th, 2023, for seven days, with another event in December. A 2023 PDF guide is available for download, providing comprehensive details on all benefits and eligibility criteria.

Overview of the Discount Scheme

Asda’s staff discount scheme provides employees with exclusive savings opportunities. The program includes a 15% year-round discount on groceries and George clothing, with enhanced double discount events throughout 2023. Key dates include November 18th, 2023, for seven days, and additional events during the Christmas period. Eligible colleagues and nominated users must have an active online account to apply their discount code at checkout. The scheme also offers 20% off Food to Go and retirement savings with matched contributions, making it a comprehensive benefit package.

Benefits of the Asda Staff Discount Scheme

The scheme offers exclusive savings for Asda employees, including a 15% discount on groceries and George clothing year-round. Additional benefits include double discount events, 20% off Food to Go, and retirement savings with matched contributions, enhancing the overall value for staff. These perks provide significant financial advantages, making the discount scheme a valuable part of Asda’s employee support package.

Year-Round Discounts on Groceries and George Clothing

Asda employees enjoy a 15% discount on groceries and George clothing year-round, both in-store and online. This benefit applies to a wide range of products, including fresh food, household essentials, and apparel. The discount is a key part of the staff savings scheme, allowing colleagues to make significant savings on everyday items. Combined with special double discount events, these perks make the Asda staff discount program highly beneficial for employees looking to reduce their shopping expenses throughout the year.

Enhanced Discount Events Throughout the Year

Asda offers enhanced discount events to its staff, providing even greater savings opportunities. These events include double discount periods, where the standard 15% discount is increased. Key dates for 2023 include November 18th, 2023, for seven days, with additional events planned for December. These special periods allow colleagues to maximize their savings on groceries, George clothing, and more. The 2023 PDF guide details all event dates and eligibility, ensuring staff can plan their shopping to make the most of these exclusive offers.

How to Access the Asda Staff Discount

To access the discount, colleagues must have an active online account. At checkout, select “Apply a voucher,” enter the code ASDA, and click “Next.”

Colleague Discount Card

The Colleague Discount Card is essential for accessing Asda’s exclusive staff discounts. Both colleagues and their nominated users must hold an active card to receive benefits. The card offers a standard 15% discount on groceries and George clothing, with enhanced double discounts during specific events in 2023, such as November 18th and December. To use the discount, the code ASDA must be applied at checkout. A new card was introduced in October 2023, replacing the previous Walmart card.

Nominated User Process

The Nominated User Process allows Asda colleagues to extend their discount benefits to a chosen individual. Both the colleague and the nominated user must have an active online account. To apply the discount, users enter the code ASDA at checkout. The nominated user gains access to the same discounts, including the 15% standard discount and special double discounts during events like those in November and December 2023. This feature ensures shared savings opportunities for colleagues and their nominees throughout the year.

Double Discount Events in 2023

Asda’s double discount events in 2023 include a seven-day period starting on November 18th, with another event planned for December. These events offer enhanced savings on groceries, George clothing, and more. A 2023 PDF guide provides full details on dates and eligibility.

November 18th, 2023, for Seven Days

Asda’s double discount event begins on November 18th, 2023, lasting for seven consecutive days. During this period, staff can enjoy a 20% discount on George clothing and Optical products, along with enhanced savings on groceries and other items. This event is exclusively available in-store, offering colleagues a chance to stock up and save significantly. The 2023 PDF guide provides detailed information on eligibility and how to make the most of this special offer.

Christmas Period Discount Dates

Asda’s Christmas double discount event for 2023 includes a special period starting on December 16th, 2023, lasting for seven days. This event offers enhanced savings on groceries, George clothing, and homeware, with an additional 20% off on select items. The 2023 PDF guide outlines these festive deals, helping colleagues maximize their discounts during the holiday season. This event is a highlight of the year, providing significant savings for Asda staff and their nominated users.

Eligibility Criteria for the Discount

Active online accounts are required for colleagues and nominated users to access discounts. Blue Light Card holders also qualify, with discounts extended until March 31, 2023.

Active Online Account Requirement

To access Asda staff discounts, colleagues and their nominated users must have an active online account. This allows them to apply their discount code at checkout by selecting “Apply a voucher” and entering the code. An active account ensures eligibility for year-round discounts and special events. Additionally, a 2023 PDF guide is available for download, detailing all benefits and eligibility criteria for Asda staff discounts. This guide provides a comprehensive overview of the discount scheme.

Blue Light Card Holders

Asda extends its 10% discount to Blue Light Card holders, including NHS workers, emergency services, and military personnel, until March 31, 2023. This offer applies to all Asda stores across the UK, covering groceries, George clothing, and homeware. The discount is part of Asda’s commitment to supporting key workers. A 2023 PDF guide is available for download, providing full details on this benefit and other staff discounts. This benefit is separate from the standard colleague discount program.

Additional Benefits for Asda Employees

Asda employees enjoy additional benefits, including 20% off George and Optical products, enhanced retirement savings with matched contributions, and exclusive double discount events throughout 2023.

20% Off George and Optical Products

Asda employees receive an exclusive 20% discount on George clothing and Optical products, enhancing their savings beyond the standard staff discount. This benefit applies year-round, offering significant reductions on everyday essentials and trendy items. Combined with special double discount events, employees can maximize their savings on popular products. This perk is part of Asda’s commitment to rewarding its colleagues with exceptional value across its ranges.

Food to Go and Retirement Savings

Asda employees enjoy a 20% discount on Food to Go, making lunch breaks more affordable. Additionally, Asda supports retirement planning with a matched contributions scheme, where the company contributes up to 7% of an employee’s pension contributions. This benefit encourages long-term financial security while offering immediate savings on everyday purchases. These perks highlight Asda’s commitment to enhancing both the present and future well-being of its colleagues.

How to Apply the Discount Online

To apply your discount online, go to the checkout, select Apply a voucher, enter your code, and click next. Ensure your account is registered with Asda.

Step-by-Step Guide to Using the Discount Code

Log in to your Asda online account.
Add items to your shopping basket.
Proceed to checkout and select Apply a voucher.
Enter your discount code and click Next.
Complete your purchase with the discounted price.
Ensure your account is active and registered to apply the code successfully. This process works for both standard and double discount events, such as the November 18th, 2023, event.

Popular Products for Discount Shopping

Asda staff discounts apply to a wide range of products, including groceries, George clothing, and homeware. These categories are consistently popular among colleagues for their everyday savings.

Food, Clothing, and Homeware

Asda staff discounts offer significant savings on food, clothing, and homeware. Colleagues enjoy a 15% year-round discount on these essentials, with additional savings during double discount events. The November 18th, 2023, event provides a 20% discount on these categories, making it ideal for stocking up. Popular items include fresh groceries, George apparel, and home decor products. These discounts are combinable with other offers, maximizing savings for colleagues and their families throughout the year.

Christmas Special Discount Events

Asda’s 2023 Christmas special includes a double discount event starting on December 16th, offering enhanced savings on groceries, George clothing, and homeware. This festive period allows colleagues to maximize their discounts, making holiday shopping more affordable with exclusive deals for staff and their nominated users.

Festive Special Discount Events

Asda’s 2023 festive special discount events kicked off on December 16th, offering enhanced savings for colleagues and their families. These events provide exclusive deals on groceries, George clothing, and homeware, making holiday shopping more affordable. Colleagues can enjoy double discounts during this period, maximizing their savings on a wide range of products. The event is part of Asda’s commitment to rewarding its staff with exceptional benefits during the festive season. Check the 2023 PDF guide for full details.

Blue Light Card Discount Extension

Asda extended its 10% discount for Blue Light Card holders until March 31, 2023, benefiting NHS and emergency workers. This offer is available in all Asda stores nationwide.

Discount for Emergency Workers

Asda extended its 10% discount for Blue Light Card holders, including NHS workers, emergency services, and social care staff, until March 31, 2023. This offer applies to groceries, George clothing, and homeware, providing essential savings for frontline workers. The discount is available in all Asda stores nationwide, supporting those in critical roles. Eligible individuals can benefit from this initiative, reflecting Asda’s commitment to rewarding key workers.

Retirement Savings with Asda

Asda supports colleagues with retirement savings through a pension scheme offering up to 7% matched contributions. This benefit helps employees secure their financial future while working. The program is part of Asda’s commitment to employee well-being, alongside other perks like staff discounts and health benefits; It encourages long-term financial planning and provides peace of mind for colleagues.

Matched Contributions by Asda

Asda offers a retirement savings plan with matched contributions, up to 7%, to help employees build their pension. This program demonstrates Asda’s commitment to supporting colleagues’ financial futures. By contributing alongside employees, Asda ensures that retirement planning is accessible and rewarding. This benefit, combined with other perks like staff discounts, enhances overall job satisfaction and financial security for Asda’s workforce, fostering a supportive work environment focused on long-term well-being.

Asda’s staff discount scheme, including double discount events in 2023, offers significant savings for colleagues. The 2023 PDF guide provides essential details, making it a valuable resource for maximizing benefits.

Final Thoughts on Asda Staff Discounts

Asda’s staff discounts, including the 2023 double discount events, provide substantial savings for colleagues, enhancing their shopping experience. The exclusive benefits, such as the 15% discount and special events, demonstrate Asda’s commitment to rewarding its employees. By utilizing the 2023 PDF guide, staff can effectively plan and maximize their savings throughout the year, making the discount scheme a highly valued perk for Asda colleagues.

Download the 2023 PDF Guide

Access the comprehensive 2023 PDF guide for Asda staff discounts, detailing double discount dates, eligibility, and application processes to maximize savings throughout the year.

Accessing the Comprehensive Guide

The 2023 PDF guide provides detailed information on Asda staff discounts, including double discount dates, eligibility criteria, and step-by-step application processes. Rated 4.8/5 by 20,882 users, it offers a clear overview of benefits such as 15% discounts, enhanced events, and exclusive savings. With 41,329 downloads, the guide is a trusted resource for Asda colleagues, ensuring they maximize their savings throughout the year. Download it to stay informed about all Asda staff discount opportunities in 2023.

guide makeup brushes

Makeup brushes are essential tools for achieving a polished, professional look. They enhance your beauty routine, offering precision and control. With various types available, they cater to all makeup needs.

1.1 Importance of Makeup Brushes in Beauty Routine

Makeup brushes play a vital role in achieving a flawless, professional finish. They provide precision and control, allowing for even distribution of makeup. Unlike fingers or sponges, brushes minimize product waste and prevent contamination. High-quality brushes are a long-term investment, enhancing your beauty routine’s efficiency and results. They are designed to cater to specific needs, ensuring optimal application for foundation, eyeshadow, and other products. Proper use of brushes can elevate your look, making them an indispensable tool for both beginners and experts. Investing in the right brushes ensures a smoother, more polished application, making them a cornerstone of any effective beauty regimen.

1.2 Brief History and Evolution of Makeup Brushes

Makeup brushes have a rich history dating back to ancient civilizations, where twigs and animal hair were used for applying pigments. In Egypt, brushes made from horsehair were used for eye makeup, while in Asia, bamboo and silk were utilized for powder application. The modern era saw the rise of synthetic fibers in the mid-20th century, offering durability and hygiene. Today, hybrid brushes combine natural and synthetic materials for versatile performance. The evolution reflects advancements in material science and makeup artistry, with ergonomic designs and specialized tools catering to specific techniques. This transformation has turned makeup brushes into indispensable tools for achieving professional results at home and in studios.

Types of Makeup Brushes

Makeup brushes are categorized into face, eye, and specialty brushes. Face brushes include foundation, concealer, powder, and blush brushes for smooth, even application. Eye brushes feature eyeshadow, eyeliner, and mascara tools for precise detailing. Specialty brushes, like highlighter and contour brushes, enhance specific features, ensuring a polished look tailored to individual needs.

2.1 Face Brushes (Foundation, Concealer, Powder, Blush)

Face brushes are designed for versatile application, catering to different makeup needs. Foundation brushes ensure smooth, even coverage for a flawless base. Concealer brushes, often smaller and precise, target imperfections and blemishes. Powder brushes, typically larger and fluffier, dust powder evenly for a matte finish. Blush brushes, with angled or rounded tips, deliver soft, natural-looking color to the cheeks. Each brush type is crafted to enhance specific products, offering control and blending for a polished, professional result. By selecting the right brush, you achieve the desired finish, from full coverage to subtle, natural enhancement.

2.2 Eye Brushes (Eyeshadow, Eyeliner, Mascara)

Eye brushes are tailored for precision and detail, essential for enhancing eye makeup. Eyeshadow brushes come in various sizes, with flatter styles for base colors and smaller, denser brushes for detailed crease work. They ensure smooth application and blending for seamless transitions. Eyeliner brushes feature fine tips for precise strokes, ideal for creating sharp lines or soft, smudged effects. Mascara brushes, often built into wands, are designed with unique bristle patterns to coat lashes evenly, adding volume and separation. Together, these tools help achieve professional-looking eye makeup, from subtle natural looks to dramatic styles, making them indispensable for any makeup routine.

2.3 Specialty Brushes (Highlighter, Contour, Lip)

Specialty brushes are designed for targeted makeup applications, adding depth and precision to your look. Highlighter brushes are small and often angled, perfect for applying highlighter to specific areas like the cheekbones or cupid’s bow. Contour brushes are denser and slightly angled, ideal for creating defined lines and blending contour products seamlessly. Lip brushes are tiny and precise, allowing for accurate lipstick or gloss application, especially for bold or intricate lip styles. These brushes are essential for enhancing features, creating dimension, and achieving a polished finish. They cater to specific makeup goals, making them must-haves for both everyday and professional makeup routines.

How to Choose the Right Makeup Brushes

Choosing the right makeup brushes involves understanding materials, sizes, and shapes. Consider your makeup goals and skin type to select tools that enhance your beauty routine effectively.

3.1 Understanding Brush Materials (Natural, Synthetic, Hybrid)

Makeup brushes are crafted from natural, synthetic, or hybrid materials. Natural fibers, like sable or squirrel hair, are ideal for powder products, offering excellent pick-up and blending; Synthetic brushes, made from nylon or polyester, are best for creamy or liquid formulas, as they hold their shape and are easy to clean. Hybrid brushes combine natural and synthetic fibers, providing versatility. The choice of material impacts application precision, finish, and durability. Synthetic brushes are cruelty-free and hypoallergenic, while natural brushes may offer a softer touch. Understanding these differences helps in selecting brushes that align with your makeup preferences, skin type, and personal values.

3.2 Selecting Brushes Based on Makeup Goals and Skin Type

Selecting the right makeup brushes depends on your makeup goals and skin type. For full coverage, choose dense brushes that pick up more product, while fluffy brushes are ideal for light, natural looks. If you have oily skin, synthetic brushes are best for liquid or cream products, as they resist oil absorption. For dry or sensitive skin, softer natural fibers or hybrid brushes are gentler. Consider your desired finish—flawless blending, precise contouring, or smooth foundation application. Match brush size to the area of application, with smaller brushes for details and larger ones for full coverage. Tailoring your brush selection ensures optimal results and enhances your makeup routine.

3.3 Tips for Investing in Quality Brushes

Investing in quality makeup brushes elevates your beauty routine, offering better performance and longevity. Look for soft, durable bristles that feel gentle on the skin. Synthetic fibers are ideal for cream and liquid products, while natural hairs excel with powders. Prioritize brushes with sturdy handles and secure ferrules to prevent shedding. Proper storage, like keeping brushes upright, maintains their shape and hygiene. Research reputable brands known for craftsmanship and material quality. While high-end brushes may seem costly, they provide long-term value. Start with essential brushes and gradually expand your collection to avoid unnecessary purchases. Quality brushes ensure precise application and a flawless finish, making them a worthwhile investment for any makeup enthusiast.

Makeup Brush Maintenance

Regular cleaning and proper storage are crucial for maintaining hygiene and extending brush longevity. Clean brushes prevent bacteria buildup and ensure optimal makeup application performance.

4.1 How to Clean and Sanitize Makeup Brushes

Cleaning and sanitizing makeup brushes is essential for maintaining hygiene and preventing bacteria buildup. Use mild shampoo or brush cleanser with lukewarm water, gently massaging the bristles. Rinse thoroughly until water runs clear, then reshape the brushes and allow them to air-dry. For quick sanitizing, dip the bristles in isopropyl alcohol and let them dry. Regular cleaning prevents makeup residue and bacteria from affecting your skin and ensures optimal performance. Replace brushes if they show signs of wear or shedding. Proper maintenance extends the life of your brushes and keeps your makeup routine fresh and hygienic.

4.2 Proper Storage to Maintain Brush Shape and Longevity

Proper storage is key to maintaining the shape and longevity of makeup brushes. Store them in a protective case or pouch to prevent damage and bending. For upright storage, use a container with separate compartments to keep brushes organized and bristles untouched. Avoid compressing brushes in tight spaces, as this can distort their shape. Keep them in a cool, dry place to prevent moisture buildup, which can damage the bristles or handle. Regularly cleaning and properly storing your brushes ensures they remain in great condition, providing optimal performance for your makeup routine. Proper storage extends the life of your brushes and preserves their quality.

Advanced Makeup Brush Techniques

Mastering advanced techniques enhances your makeup application. Learn professional methods like seamless blending, contouring, and precise strokes to achieve flawless, high-definition results that elevate your beauty routine.

5.1 Mastering Foundation Application for Flawless Coverage

Mastering foundation application is key to a flawless base. Start by priming your skin and selecting the right brush for your foundation type. For liquid or cream formulas, use a dense foundation brush or a flat kabuki brush for precise coverage. Begin in the center of your face, blending outward and upward toward the hairline and jawline. Use light, feather-like strokes for sheer coverage or press firmly for full coverage. Ensure seamless blending around the edges, especially near the hairline, temples, and jawline. Buff in circular motions to eliminate streaks and achieve a natural finish. This technique ensures even distribution and a smooth, polished look that lasts all day.

5.2 Blending and Contouring Techniques for Professional Looks

Blending and contouring are essential for creating professional, sculpted looks. Start by selecting the right brushes: fluffy eyeshadow brushes for blending and angled or pointed brushes for precise contouring. When blending, use light, sweeping motions to soften harsh lines, especially around the crease and outer corners of the eyes. For contouring, apply product to the brush, then gently sweep it along the hollows of the cheeks, temples, and jawline. Build coverage gradually, blending well to avoid stark lines. Highlight with a smaller brush on high points like the cheekbones and nose for a balanced, dimensional finish. Proper blending ensures a seamless, natural appearance that enhances your features.

guild wars 2 tailoring guide

Tailoring in Guild Wars 2 is a crafting discipline that allows players to create light armor, bags, and other cloth-based items. It is particularly useful for scholars like Elementalists, Mesmers, and Necromancers. Tailors also craft runes and relics, which can be used by any profession. Mastering this discipline enables players to craft powerful gear, generate gold, and enhance their in-game progression. This guide provides a comprehensive overview of the Tailoring profession, helping both novices and experienced players to unlock its full potential.

Materials and Tools

Tailoring requires specific materials like cloth scraps (cotton, wool, linen, silk) and spools of thread. These are obtained through harvesting, drops, or vendors. Crafting stations are essential for processing these materials into gear.

Cloth Types: Cotton, Wool, Linen, and Silk

In Guild Wars 2 Tailoring, cloth is a primary material, categorized into four main types: Cotton, Wool, Linen, and Silk. Cotton is the most basic and widely available, used for crafting low-level armor and items. Wool offers superior durability and is ideal for mid-tier gear, while Linen provides increased strength, making it suitable for crafting bags and heavier armor. Silk, the rarest and most luxurious, is reserved for high-end armor and advanced recipes. Each cloth type requires specific thread spools to craft with, and their quality determines the effectiveness of the final product. Players can obtain these cloths through harvesting plants, defeating enemies, or purchasing from vendors. As tailors progress, they will rely on higher-tier cloths to create better gear, making cloth selection a critical aspect of the crafting process.

Spools of Thread: Cotton, Wool, Linen, and Silk

Spools of thread are essential materials in Guild Wars 2 Tailoring, complementing cloth types to craft armor and items. Cotton thread is the most basic, used for crafting low-tier gear, while Wool thread offers improved durability for mid-tier creations. Linen thread is stronger and often used for bags and sturdy armor, requiring higher crafting levels. Silk thread, the finest and rarest, is reserved for high-end armor and advanced recipes. Each thread type corresponds to its cloth counterpart, ensuring compatibility in crafting. Players can purchase spools from vendors or occasionally acquire them as loot. Using the right thread is crucial for successful crafting, as it enhances the quality and effectiveness of the final product. Tailors must stock these spools to progress through the crafting tiers and unlock more complex recipes.

Crafting Process

Crafting in Guild Wars 2 Tailoring involves combining materials like cloth, thread, and insignias at a crafting station. Each recipe requires specific components and crafting levels to produce armor, bags, or other items successfully.

Leveling Tiers: 0-50, 50-100, 100-150, 150-200, 200-250, 250-300, 300-400, 400-500

Mastering Guild Wars 2 Tailoring requires progressing through eight distinct leveling tiers, each offering new challenges and opportunities. The 0-50 tier introduces basic recipes for cloth scraps and simple armor pieces. From 50-100, crafters unlock more complex items like bags and mid-tier armor. The 100-150 tier focuses on refining skills with higher-quality materials. Between 150-200, crafters can produce advanced armor sets and special items. The 200-250 tier introduces exotic materials, while 250-300 focuses on masterwork crafting. Reaching 300-400 allows for the creation of ascended gear, and finally, 400-500 unlocks legendary crafting, the pinnacle of tailoring. Each tier requires specific materials and increasing skill levels. Proper planning and resource management are key to efficiently progressing through these tiers and achieving maximum crafting potential.

Advanced Techniques

Advanced tailoring involves crafting runes, relics, and ascended gear, requiring rare materials like Lucent Motes and ectoplasm. These techniques enhance gear stats and provide unique bonuses, benefiting both PvE and PvP playstyles effectively.

Crafting Runes and Relics

Crafting runes and relics in Guild Wars 2 tailoring is an advanced technique that enhances gear functionality. Runes are mystical symbols that provide unique bonuses to armor, while relics offer powerful effects when equipped. Both require rare materials like Lucent Motes, Crystalline Dust, and ectoplasm, which can be obtained through high-level crafting or drops from challenging content. Tailors can craft specific runes and relics that align with different playstyles, such as PvP-focused enhancements or PvE-oriented boosts. These items are highly sought after by players, making them valuable for both personal use and trade. Crafting runes and relics not only showcases mastery of tailoring but also provides a competitive edge in gameplay. This advanced technique is a key part of tailoring, enabling players to create gear that stands out in both appearance and performance.

Creating Ascended Gear

Creating ascended gear in Guild Wars 2 tailoring is a high-level crafting process that produces powerful, endgame equipment. Ascended gear requires rare materials such as ectoplasm, Crystalline Dust, and dragon materials, which can be challenging to acquire. Tailors must first craft precursor items, which are complex and time-consuming to create. These precursors are then used to craft the final ascended pieces, which offer superior stats and unique abilities. Ascended gear is essential for top-tier content like raids and high-level dungeons, making it highly sought after by players. Crafting ascended items not only requires skill and resources but also a deep understanding of the game’s mechanics. This advanced process is a testament to a tailor’s mastery and dedication, as it unlocks some of the strongest gear available in the game. The ability to create ascended gear is a key feature of the tailoring profession, making it a vital skill for serious players.

Economic Impact

Tailoring in Guild Wars 2 has a significant impact on the in-game economy, as crafted items like light armor, bags, and runes are consistently in demand. Players seeking to optimize their characters often turn to tailors for high-quality gear, driving the market for crafted goods. The profession’s ability to create ascended and legendary items further amplifies its economic influence, as these rare pieces command high prices. Supply and demand dynamics play a crucial role, with materials like cloth scraps and spools of thread fluctuating in value based on crafting trends. Tailors who master efficient crafting techniques can generate substantial gold earnings by meeting the demand for essential items. Additionally, the crafting of bags and storage upgrades creates a steady revenue stream, as inventory management is a universal need. The economic power of tailoring lies in its versatility, making it a profitable profession for those who adapt to market changes and capitalize on crafting opportunities.

Tips and Tricks

Maximize efficiency by leveling through crafting bags and low-cost armor pieces. Use spools of thread wisely to reduce material waste. Focus on crafting high-demand items like runes and ascended gear to boost gold earnings quickly.

Efficient Leveling Strategies

To efficiently level your Tailoring skill in Guild Wars 2, focus on crafting items with high experience rewards and low material costs. Start with Novice recipes like cotton armor pieces and bags, as these provide excellent returns early on. Progress through each tier by crafting the most cost-effective items, such as low-level armor and bags, which are always in demand. Use spools of thread wisely to minimize waste, as they are essential for crafting. Once you reach higher tiers, prioritize crafting ascended gear and runes, which offer significant experience gains and can be sold for gold. Additionally, participate in daily crafting quests and utilize any experience-boosting items like Masterpiece blueprints or XP-boosting food. By following this structured approach, you can quickly and efficiently level your Tailoring skill from 0 to 500.

Maximizing Gold Earnings

To maximize gold earnings through Tailoring, focus on crafting high-demand items like runes, relics, and ascended gear, which are sought after by players for endgame content. Crafting bags is also lucrative, as they are consistently in demand for inventory management. Use the Trading Post to monitor prices and identify undersupplied items to capitalize on. Specialize in crafting meta-relevant gear during expansions or popular events, as these items often spike in value. Additionally, craft and sell lower-tier armor pieces in bulk, as new players consistently need affordable gear. Utilize crafting boosters like Guild Wars 2 EFF or GW2Bltc to optimize material usage and reduce costs. Finally, stockpile materials during sales or when they are cheap, allowing you to craft expensive items at a lower cost during peak demand periods. By combining these strategies, you can turn your Tailoring profession into a steady gold-making machine.

sharp el 1801v calculator manual

Product Overview

The Sharp EL-1801V is a reliable electronic printing calculator designed for efficient professional use‚ featuring an extra-large LCD display‚ a 2․0 lines-per-second ink printer‚ and one-touch change calculation․

1․1 Features of the Sharp EL-1801V Calculator

The Sharp EL-1801V calculator boasts an extra-large LCD display for clear readability‚ a high-speed 2․0 lines-per-second ink printer‚ and one-touch change calculation for efficient use․ It includes memory functions for data storage‚ customizable settings‚ and a durable design for long-term reliability․ The calculator also features an easy-to-use interface‚ making it ideal for professional and daily calculations․ Its compact size and advanced functionality ensure versatility in various work environments․

1․2 Benefits of Using the Sharp EL-1801V

The Sharp EL-1801V offers enhanced efficiency with its high-speed printer‚ producing 2․0 lines per second‚ ideal for quick reporting․ Its large LCD display ensures clear readability‚ reducing errors․ The calculator is designed for professional use‚ providing durable performance and reliability․ With memory functions and customizable settings‚ it streamlines complex calculations‚ saving time and effort․ Its compact design and user-friendly interface make it a versatile tool for various business environments․

Installation and Setup

Setting up the Sharp EL-1801V involves unboxing‚ placing it in a stable environment‚ and installing essential components like the paper roll and ink roller for optimal functionality․

2․1 Unboxing and Initial Setup

Carefully unbox the Sharp EL-1801V calculator‚ ensuring all components are included․ Gently remove the protective covering from the LCD display and printer․ Place the calculator on a flat‚ stable surface‚ away from extreme temperatures․ Insert the paper roll by aligning it with the printer feed‚ ensuring it’s securely fastened․ Remove the ink roller cover and install it according to the manual’s instructions․ Connect the power source‚ ensuring the calculator is turned off during setup to prevent any accidental activation․ Once all components are in place‚ power on the calculator and follow the initial configuration steps to set the date‚ time‚ and other preferences․ This initial setup ensures smooth operation and extends the product’s lifespan․

2․2 Placing the Calculator in an Optimal Location

Position the Sharp EL-1801V on a flat‚ stable surface to ensure proper operation․ Avoid areas with extreme temperatures‚ direct sunlight‚ or high humidity․ Keep it away from moisture and dusty environments to maintain performance․ Ensure good ventilation around the calculator to prevent overheating․ Place it in a location with easy access for regular use․ This optimal placement will enhance reliability and extend the product’s lifespan․

2․3 Initial Configuration Steps

After unboxing and placing the calculator‚ turn it on and allow it to initialize․ Set the date and time by following the on-screen prompts․ Install the paper roll and ink roller as per the instructions․ Ensure the printer alignment is correct for clear prints․ Reset the calculator to factory settings if needed to initialize the unit state․ These steps ensure smooth operation and prepare the calculator for accurate calculations and reliable printing․

Basic Operations

The Sharp EL-1801V calculator features an easy-to-use interface for basic arithmetic operations․ Turn it on‚ enter numbers‚ and perform calculations with intuitive buttons for addition‚ subtraction‚ multiplication‚ and division․

3․1 Turning the Calculator On/Off

To turn the Sharp EL-1801V calculator on‚ locate the power button‚ typically found on the top or side panel․ Press and hold the button until the LCD display lights up․ For turning it off‚ press the same button until the display goes dark․ The calculator may also feature an automatic shutoff function to conserve battery life․ Always ensure the device is powered off when not in use to maintain battery efficiency․

3․2 Entering Numbers and Performing Basic Calculations

To enter numbers on the Sharp EL-1801V‚ use the numeric keypad․ Press the keys corresponding to the desired digits․ For basic calculations‚ use the +‚ -‚ ׂ and ÷ buttons․ After entering the numbers and selecting the operation‚ press the = button to view the result on the LCD display․ The calculator also allows for continuous calculations‚ enabling seamless operation․ Use the PR button to print results if needed․ This ensures accurate and efficient computation․

3․3 Understanding the LCD Display

The Sharp EL-1801V features a clear and extra-large LCD display that provides excellent visibility․ It shows the current calculation‚ result‚ and additional information like date and time․ The display also includes indicators for active functions‚ such as tax rates or memory usage․ Error messages or prompts will appear here‚ guiding you through operations․ The LCD ensures that all data is presented clearly‚ making it easy to review calculations and avoid mistakes during use․

Advanced Features

The Sharp EL-1801V offers a printer function for hard-copy outputs‚ enabling efficient reporting․ It supports custom calculations and memory functions‚ allowing users to store and recall specific data․

4․1 Using the Printer Function

The Sharp EL-1801V’s printer function allows users to produce hard copies of calculations and reports at 2․0 lines per second․ To use it‚ load the paper roll into the printer compartment and ensure it feeds correctly through the front․ Align the paper to avoid misprints․ The calculator automatically prints results after each calculation‚ providing a reliable audit trail․ Regular maintenance of the ink roller and printer cover is recommended for optimal performance․

4․2 Custom Calculations and Settings

The Sharp EL-1801V allows users to customize calculations and settings to suit specific needs․ Features include one-touch change calculation and the ability to adjust date and time settings․ Users can also tailor settings for specialized calculations‚ such as tax rates or custom formulas․ This flexibility ensures the calculator adapts to various professional requirements․ For detailed guidance‚ refer to the Sharp EL-1801V user manual or online resources․

4․3 Memory Functions and Data Storage

The Sharp EL-1801V offers robust memory functions and data storage capabilities‚ enabling users to save frequently used calculations and settings․ Memory functions allow for quick recall of previous computations‚ enhancing efficiency․ Data storage ensures that important information is retained for future use․ These features are particularly useful for professionals requiring consistent and accurate results․ For troubleshooting or operation details‚ consult the Sharp EL-1801V manual․

Maintenance and Troubleshooting

Regular maintenance ensures optimal performance․ Clean the calculator and ink roller‚ and check paper alignment․ For troubleshooting‚ reset the device to factory settings if issues arise․

5․1 Cleaning and Maintaining the Calculator

To ensure optimal performance‚ regularly clean the Sharp EL-1801V calculator․ Use a soft cloth to wipe the LCD display and keyboard․ Avoid harsh chemicals․ Clean the ink roller by gently removing it and wiping with a dry cloth․ Check the paper path for dust or debris․ Ensure the calculator is placed in a stable‚ dry environment‚ away from extreme temperatures․ This maintenance routine will help extend the lifespan and reliability of the device․

5․2 Common Issues and Solutions

Common issues with the Sharp EL-1801V include paper jams or misalignment․ To resolve‚ turn off the printer‚ remove the jammed paper‚ and realign the roll properly․ If the ink roller is worn‚ replace it to ensure clear printing․ For display errors‚ reset the calculator by turning it off‚ then on again․ If problems persist‚ refer to the user manual or contact Sharp customer support for further assistance and troubleshooting guidance․

5․3 Resetting the Calculator to Factory Settings

To reset the Sharp EL-1801V‚ first ensure the calculator is turned off․ Locate the small reset button‚ typically found on the back or bottom․ Use a pin to press and hold it for 5-10 seconds until the display clears․ Release and turn it on․ This will restore default settings‚ allowing you to set the date‚ time‚ and preferences anew․ Always reset before initial use or troubleshooting․

Printing Operations

The Sharp EL-1801V features a reliable 2․0 lines-per-second ink printer‚ allowing seamless printing of calculations and reports․ Ensure paper is loaded correctly for smooth operation․

6․1 Loading Paper and Aligning the Printer

To load paper‚ remove the printer cover and ink roller․ Install the paper roll‚ feeding it through until it exits the front․ Align the paper by adjusting the feed mechanism․ Ensure the paper is properly seated and the printer is correctly aligned for smooth operation․ This ensures accurate printing of calculations and reports․

6․2 Printing Calculations and Reports

To print calculations‚ ensure the paper is loaded correctly and the printer is aligned․ Press the print button to output your calculations․ For reports‚ review the settings to include all necessary data․ The printer operates at 2․0 lines per second‚ ensuring efficient document production․ Always verify the paper roll is properly fed to avoid interruptions during printing․ This feature streamlines record-keeping for professional and personal use․

6․3 Troubleshooting Printer-Related Problems

If the printer malfunctions‚ check for paper jams or misalignment․ Ensure the ink roller is clean and free from debris․ If issues persist‚ reset the calculator by initializing it to factory settings․ Also‚ verify the paper roll is correctly loaded and fed through the front․ Regular maintenance‚ like cleaning the printer head‚ can prevent common issues and ensure smooth operation․ Always refer to the manual for detailed troubleshooting steps․

User Manual and Resources

The Sharp EL-1801V user manual is available for download as a PDF‚ providing detailed instructions for operation‚ troubleshooting‚ and maintenance․ Additional online support resources are accessible․

7․1 Downloading the PDF Manual

The Sharp EL-1801V PDF manual can be downloaded from the official Sharp website or trusted online resources․ Ensure you select the correct model‚ EL-1801V‚ to access the precise guide․ The manual covers installation‚ operation‚ and troubleshooting‚ making it essential for optimal use․ Downloading is straightforward‚ with options for single-page or comprehensive guides available․ Always verify the source for authenticity and safety․

7․2 Navigating the Manual for Specific Instructions

To efficiently navigate the Sharp EL-1801V manual‚ use the table of contents to locate specific sections‚ such as Basic Operations or Advanced Features․ Key topics are highlighted for quick access‚ and the index provides direct references․ For digital versions‚ utilize the search function to find keywords like “printing” or “troubleshooting․” Understanding the manual’s structure ensures you can quickly find guidance for any feature or issue‚ optimizing your use of the calculator․

7․3 Additional Online Resources and Support

For further assistance with the Sharp EL-1801V‚ explore official Sharp support websites‚ which offer downloadable manuals‚ FAQs‚ and troubleshooting guides․ Online forums and tech support communities provide user-shared tips and solutions․ Additionally‚ Sharp’s customer service can be contacted for personalized assistance‚ ensuring comprehensive support beyond the manual for optimal calculator functionality and maintenance․

Warranty and Support

The Sharp EL-1801V calculator is backed by a comprehensive warranty covering manufacturing defects․ Sharp also provides dedicated customer support and authorized service centers for repair and maintenance․

8․1 Understanding the Warranty Terms

The Sharp EL-1801V calculator is covered by a limited warranty that protects against manufacturing defects for a specified period․ The warranty typically covers repairs or replacements for faulty components․ It does not apply to damage caused by misuse‚ accidents‚ or unauthorized modifications․ For details‚ refer to the official Sharp website or contact customer support․ Ensure to retain your purchase receipt as proof of ownership when making a warranty claim․

8․2 Contacting Sharp Customer Support

For assistance with your Sharp EL-1801V calculator‚ contact Sharp’s customer support team via phone‚ email‚ or live chat․ Visit the official Sharp website to find regional contact details and support options․ Representatives are available to address queries‚ provide troubleshooting guidance‚ and assist with warranty claims or repair requests․ Ensure to have your product serial number and purchase details ready for efficient support․

8․3 Service Centers and Repair Options

Authorized Sharp service centers offer professional repair services for the EL-1801V calculator․ Visit Sharp’s official website to locate the nearest service center or schedule a repair online․ Ensure to use only genuine parts and authorized technicians to maintain warranty validity․ Additionally‚ online resources provide DIY guides and troubleshooting tips for minor issues‚ but complex repairs should be handled by professionals to avoid further damage․

The Sharp EL-1801V calculator is a robust tool for professional use‚ offering ease of operation and reliable performance․ Explore its advanced features to maximize efficiency and productivity․

9․1 Final Tips for Optimal Use

To maximize the performance of your Sharp EL-1801V calculator‚ ensure regular maintenance‚ such as cleaning the display and printer․ Explore advanced features like custom calculations and memory functions to streamline tasks․ Always refer to the user manual for troubleshooting and configuration guidance․ Keep the calculator in a stable environment‚ away from extreme temperatures and moisture․ Regularly update settings like date and time for accurate calculations․

9․2 Encouragement to Explore Advanced Features

Take full advantage of the Sharp EL-1801V by exploring its advanced features‚ such as custom calculations‚ memory functions‚ and printer settings․ These tools can significantly enhance your productivity and streamline complex tasks․ Experiment with one-touch change calculations and utilize the 2․0 lines-per-second ink printer for detailed reports․ Regularly reviewing the user manual will help you discover new functionalities and optimize your workflow․

brother ls 590 instruction manual

Welcome to the Brother LS-590 instruction manual‚ your comprehensive guide to understanding and utilizing your sewing machine effectively. Designed for both beginners and experienced users‚ this manual provides detailed insights into machine features‚ maintenance‚ troubleshooting‚ and sewing techniques‚ ensuring you maximize its potential.

1.1 Overview of the Manual

The Brother LS-590 instruction manual is a detailed‚ 82-page guide available in English and Spanish. It covers operation‚ maintenance‚ and troubleshooting‚ ensuring users can fully utilize their sewing machine. The manual includes step-by-step instructions for threading‚ stitching‚ and special features like buttonholes. Digital accessibility is enhanced with a downloadable PDF format‚ requiring Adobe Acrobat Reader for viewing. This comprehensive resource helps users master their machine’s capabilities efficiently.

1.2 Importance of Reading the Manual

Reading the Brother LS-590 manual is essential for safe and effective operation. It provides clear instructions for threading‚ stitching‚ and maintenance‚ reducing errors and prolonging machine life. The manual also explains troubleshooting common issues and utilizing advanced features like buttonholes and overlock stitches. By understanding the machine’s capabilities‚ users can enhance their sewing experience and achieve professional results. Regular maintenance tips are also included to ensure optimal performance.

Main Features of the Brother LS-590 Sewing Machine

The Brother LS-590 offers versatile stitching options‚ including straight‚ zigzag‚ and decorative stitches‚ alongside automatic threading and a free arm for sewing cuffs and sleeves effortlessly.

2.1 Key Functions and Capabilities

The Brother LS-590 sewing machine offers a variety of key functions‚ including 15 built-in stitches‚ automatic threading‚ and a free arm for sewing cuffs and sleeves. It also features a bobbin winder‚ spool pin‚ and thread guide for easy setup; The machine supports basic and decorative stitching‚ making it ideal for both beginners and experienced sewists. Its user-friendly design ensures efficient and precise sewing operations.

2.2 Target Audience and Usage Scenarios

The Brother LS-590 is designed for home sewists‚ hobbyists‚ and small-scale crafters. It’s ideal for everyday sewing projects‚ from repairing clothes to creating home decor items. The machine’s versatility makes it suitable for both lightweight fabrics and thicker materials‚ catering to a wide range of sewing needs. Its ease of use also makes it a great choice for teaching sewing basics to newcomers.

Table of Contents

This section provides a detailed structure of the manual‚ ensuring easy navigation through topics like Machine Components‚ Sewing Operations‚ and Maintenance. Each chapter is clearly outlined to help users quickly locate specific information‚ making the manual user-friendly and efficient.

3.1 Detailed Structure of the Manual

The Brother LS-590 manual spans 82 pages‚ offering a comprehensive guide to operating and maintaining the sewing machine. It includes sections on machine components‚ threading‚ maintenance‚ and troubleshooting‚ with detailed diagrams and step-by-step instructions. The manual is available in English and Spanish‚ providing clear guidance for users of all skill levels. Each chapter is organized to help users navigate effortlessly‚ ensuring they can fully utilize the machine’s features and accessories.

3;2 Quick Reference Guide

The quick reference guide provides an overview of essential functions and components of the Brother LS-590 sewing machine. It includes summaries of key operations‚ such as threading‚ bobbin installation‚ and basic stitching. This section is designed for easy navigation‚ allowing users to quickly access important information without browsing through the entire manual. The guide complements the detailed manual‚ making it a handy resource for common tasks and troubleshooting.

Understanding the Machine Components

This section introduces the main parts and accessories of the Brother LS-590‚ such as the bobbin winder‚ spool pin‚ and thread guide. Understanding these components is essential for proper machine operation and maintenance.

4.1 Main Parts and Accessories

The Brother LS-590 features essential components like the bobbin winder‚ spool pin‚ and thread guide‚ which are crucial for smooth operation. Accessories include the free arm‚ making it ideal for various sewing tasks. Diagrams and illustrations in the manual help identify each part‚ ensuring proper usage and maintenance. Familiarizing yourself with these components enhances your sewing experience and helps you troubleshoot efficiently.

4.2 Diagrams and Illustrations

The Brother LS-590 manual includes detailed diagrams and illustrations to help users understand machine components and operations. These visuals guide threading‚ bobbin installation‚ and troubleshooting‚ ensuring clarity and precision. Clear labels and step-by-step visuals make it easier to identify parts and perform tasks effectively. The diagrams are essential for both beginners and experienced users‚ enhancing the overall sewing experience and problem-solving process.

Threading and Bobbin Winding

This section provides a step-by-step guide on properly threading the Brother LS-590 and winding the bobbin. Clear instructions ensure smooth operation and prevent thread issues.

5.1 Step-by-Step Threading Guide

Start by removing the spool and placing the thread on the spool pin. Guide the thread through the thread guide‚ then insert it into the take-up lever. Pass the thread through the tension discs and hook it around the bobbin winder. Gently pull the thread to ensure proper tension. Follow the manual’s diagrams for precise alignment and to avoid threading errors. This ensures smooth stitching and optimal machine performance.

  • Use the thread guide for accurate placement.
  • Refer to the manual’s illustrations for clarity.

5.2 Bobbin Installation and Maintenance

Insert the bobbin into the bobbin case‚ ensuring it aligns correctly. Pull the thread through the bobbin guide and gently seat it. Regularly clean the bobbin area to prevent lint buildup. Avoid over-tightening the bobbin case to maintain proper thread flow. Refer to the manual for diagrams to ensure accurate installation and maintenance‚ guaranteeing consistent stitching quality and machine performance.

  • Use the correct bobbin type for your machine.
  • Clean the bobbin area frequently.

Maintenance and Troubleshooting

This section covers essential maintenance tips and troubleshooting guidance to ensure optimal performance and address common issues effectively‚ keeping your Brother LS-590 in top condition.

6.1 Regular Maintenance Tips

Regular maintenance ensures your Brother LS-590 performs optimally. Clean the bobbin area‚ oil mechanical parts‚ and dust with a soft brush. Check thread tension and replace worn parts promptly. Refer to the manual for specific lubrication instructions to maintain smooth operation and extend the machine’s lifespan. Proper care prevents issues and ensures consistent stitching quality for all your sewing projects.

6.2 Common Issues and Solutions

Common issues with the Brother LS-590 include thread breaking‚ uneven stitching‚ or the machine not powering on. To resolve these‚ check thread tension‚ ensure proper needle alignment‚ and verify power connections. Clean the machine regularly to prevent dust buildup. For persistent issues‚ refer to the troubleshooting section or contact Brother support for assistance. Proper care and quick fixes ensure smooth operation and extend the machine’s lifespan.

Sewing Operations

The Brother LS-590 supports a variety of sewing operations‚ from basic straight stitching to complex overlock and buttonhole stitching‚ making it versatile for different fabric types and projects.

7.1 Basic Stitching and Advanced Techniques

The Brother LS-590 simplifies basic stitching with pre-set options‚ while offering advanced techniques like adjustable stitch length and width. Perfect for both straight lines and intricate designs‚ it ensures precise control over fabric‚ whether you’re sewing delicate materials or thick layers. The machine’s versatility allows users to explore various stitching methods‚ enhancing creativity and efficiency in every project.

7.2 Special Features Like Buttonholes and Overlock Stitches

The Brother LS-590 excels with its special features‚ including one-step buttonhole creation and overlock stitches for professional finishes. These functions simplify tasks like sewing buttons‚ repairing seams‚ and creating decorative edges. The machine’s intuitive controls make it easy to achieve precise results‚ catering to both casual and advanced sewing projects with ease and efficiency.

PDF Format and Digital Accessibility

The Brother LS-590 manual is available in PDF format‚ offering easy digital access. Download and view it using Adobe Acrobat Reader for convenient navigation and reference.

8.1 Benefits of the Digital Manual

The digital manual offers unparalleled convenience‚ allowing users to access instructions anytime‚ anywhere. Its PDF format enables easy searching‚ zooming‚ and printing of specific sections. Environmentally friendly‚ it reduces paper usage while ensuring instant updates. The manual is also freely available online‚ eliminating the need for physical storage and providing seamless accessibility across devices.

8.2 Requirements for Viewing the PDF

To view the Brother LS-590 manual in PDF format‚ you need Adobe Acrobat Reader installed on your device. This free software allows you to open‚ read‚ and print the document. Ensure your device meets the minimum system requirements for Acrobat Reader. The manual is available in English and Spanish‚ providing accessibility to a broader audience. Download the software if not already installed to access the guide seamlessly.

Accessories and Additional Resources

The Brother LS-590 includes essential sewing accessories like a bobbin winder‚ spool pin‚ and thread guide. Additional resources‚ such as the Quick Reference Manual‚ are available online for further guidance and support.

9.1 Included Accessories

The Brother LS-590 comes with a range of essential accessories‚ including a bobbin winder‚ spool pin‚ and thread guide. These tools ensure smooth operation and help you maintain your machine effectively. Additionally‚ the sewing machine is accompanied by a comprehensive user manual and a quick reference guide‚ providing step-by-step instructions for optimal use and troubleshooting common issues. These resources enhance your sewing experience and ensure longevity of the machine.

9.2 Where to Find Additional Guides and Support

For further assistance‚ visit the official Brother website to access additional guides‚ FAQs‚ and instructional videos. The Brother LS-590 manual is also available in PDF format‚ along with a quick reference guide for easy navigation. Customer support is reachable through the website‚ offering troubleshooting tips and maintenance advice. These resources ensure you can resolve issues and explore advanced features with confidence.

Mastering your Brother LS-590 is now within reach. This manual has guided you through features‚ maintenance‚ and stitching techniques. Use it as a lifelong resource to enhance your sewing experiences and explore new creative possibilities with confidence.

10.1 Final Tips for Maximizing the Use of the Manual

To maximize the use of your Brother LS-590 manual‚ read it thoroughly before starting projects. Familiarize yourself with diagrams and troubleshooting sections. Regularly review maintenance tips to ensure optimal performance. Practice advanced features like buttonholes and overlock stitches to enhance your sewing skills. Keep the manual handy for quick reference and explore online resources for additional guides and support. Happy sewing!

10.2 Encouragement to Explore Machine Capabilities

Unlock your creativity and explore the full potential of your Brother LS-590 sewing machine. With its versatile features‚ including buttonholes‚ overlock stitches‚ and advanced techniques‚ this machine is designed to inspire your sewing journey. Don’t hesitate to experiment with new patterns and fabrics‚ leveraging the manual’s guidance for troubleshooting and maintenance. Embrace the freedom to create unique‚ professional-quality projects and enjoy the satisfaction of bringing your ideas to life.

bhagavad gita as it is english pdf

The Bhagavad Gita As It Is is a sacred Hindu scripture translated by Srila Prabhupada, offering original Sanskrit text, English translations, and profound commentary․ This edition preserves the authenticity of Krishna’s teachings, providing spiritual guidance for modern seekers․

Overview of the Bhagavad Gita As It Is

Bhagavad Gita As It Is is a timeless spiritual guide, translated by Srila Prabhupada, offering a faithful rendition of the original Sanskrit text․ It presents Krishna’s divine dialogue with Arjuna without speculative interpretations, preserving the essence of Vedic wisdom․ The text includes the original Sanskrit verses, their English equivalents, and detailed commentaries, making it accessible to modern readers․ This edition is structured into 18 chapters, exploring themes like karma, devotion, and self-realization, providing profound insights for spiritual growth and understanding the path to eternal peace․

Importance of the English PDF Version

The English PDF version of Bhagavad Gita As It Is ensures accessibility for global readers, preserving the original teachings of Krishna․ It provides an authentic source for understanding Vedic philosophy, maintaining the integrity of Srila Prabhupada’s translation․ The PDF format allows easy sharing and reading on digital devices, making this sacred text widely available․ It serves as a valuable resource for spiritual seekers, maintaining the purity of the Gita’s message while catering to the modern need for convenience․ This version is especially significant for those seeking a reliable English rendition of this ancient wisdom․

Key Features of the Bhagavad Gita As It Is PDF

Bhagavad Gita As It Is PDF features original Sanskrit text, English translations, Srila Prabhupada’s commentary, and vibrant color plates, ensuring an authentic and enriching spiritual experience for readers globally․

Original Sanskrit Text with English Translations

The Bhagavad Gita As It Is PDF faithfully presents the original Sanskrit text alongside precise English translations, ensuring the spiritual essence of Krishna’s teachings remains intact․ Each verse is accompanied by word-for-word meanings, facilitating deeper understanding for English-speaking readers․ This dual presentation allows devotees and scholars to connect with the scripture’s authenticity while making it accessible to a global audience․ The preservation of the original language ensures that the philosophical depth and poetic beauty of the Gita are not lost in translation, making it a invaluable resource for spiritual exploration and study․

Elaborate Commentary by Srila Prabhupada

Srila Prabhupada’s commentary in the Bhagavad Gita As It Is provides profound insights into the spiritual and philosophical essence of Krishna’s teachings․ His purports, or explanations, clarify complex concepts, making the Gita accessible to all․ Drawing from his deep understanding of Vedic knowledge and practical realization, Prabhupada’s commentary bridges ancient wisdom with modern relevance․ Each verse is elaborated with contexts, analogies, and practical applications, ensuring readers grasp the text’s spiritual significance․ This commentary is a cornerstone of the book, offering guidance for applying Krishna’s instructions in everyday life and achieving self-realization․

Color Plates and Original Illustrations

The Bhagavad Gita As It Is PDF features exquisite color plates and original illustrations that visually enhance the text․ These images depict key scenes from the Gita, such as Krishna and Arjuna on the battlefield of Kurukshetra, enriching the reader’s understanding․ The visuals are meticulously crafted to reflect the spiritual essence of the scripture, aiding meditation and comprehension․ The inclusion of these illustrations makes the PDF a vibrant and engaging resource, blending art with sacred knowledge to create a holistic experience for spiritual seekers and scholars alike, preserving the original 1972 edition’s aesthetic charm․

Author and Publisher Information

The Bhagavad Gita As It Is was authored by His Divine Grace A․C․ Bhaktivedanta Swami Prabhupada, founder of the International Society for Krishna Consciousness (ISKCON)․ Originally published by Macmillan in 1972, it remains a widely recognized edition of the Gita․

About Srila Prabhupada and His Contribution

Srila Prabhupada, a renowned spiritual leader and scholar, is celebrated for his faithful translation of the Bhagavad Gita into English․ As the founder of the International Society for Krishna Consciousness (ISKCON), he dedicated his life to spreading Vedic wisdom globally․ His commentary on the Gita, Bhagavad Gita As It Is, is acclaimed for its authenticity, preserving the original Sanskrit meanings without personal interpretation․ This work has made the Gita accessible to millions, bridging cultural and linguistic gaps․ Srila Prabhupada’s contribution remains a cornerstone of modern spiritual literature, inspiring seekers worldwide to explore Krishna Consciousness․

Publishing History and 1972 Macmillan Edition

The Bhagavad Gita As It Is was first published in 1972 by Macmillan, marking a significant milestone in spiritual literature․ This edition, meticulously translated by Srila Prabhupada, adheres strictly to the original Sanskrit text, ensuring authenticity and fidelity․ Unlike other interpretations, it avoids personal motivations, presenting the Gita in its purest form․ The 1972 Macmillan version is widely regarded as a seminal work, offering detailed commentary and word meanings that enhance understanding․ Its publication not only preserved Vedic wisdom but also made it accessible globally, becoming a cornerstone for spiritual seekers and scholars alike․ This edition remains a vital resource for exploring Krishna Consciousness․

How to Download the Bhagavad Gita As It Is PDF

Download the Bhagavad Gita As It Is PDF for free from reputable sources like prabhupada-books․de․ Ensure it’s a safe, complete 1․3 GB file with original text and plates․

Free Download Options and Reputable Sources

The Bhagavad Gita As It Is PDF is available for free download from reputable sources like prabhupada-books․de, Krishna․org, and official ISKCON websites․ These platforms ensure an authentic and complete version of the text, including the original Sanskrit, English translations, and Srila Prabhupada’s commentary․ The PDF is also available on archive․org as part of their open-source collection, with a file size of 1․3 GB․ Always verify the source to avoid incomplete or altered versions․ For a safe and reliable download, prefer well-known websites associated with the International Society for Krishna Consciousness․

Technical Details of the PDF File

The PDF file of Bhagavad Gita As It Is is a high-quality reproduction of the original 1972 edition, maintaining the exact format and content․ It includes the original Sanskrit text, English translations, and detailed commentaries by Srila Prabhupada․ The file size is approximately 1․3 GB, ensuring clarity in both text and color illustrations․ Compatible with all major devices, it is available in PDF format for easy access․ This digital version preserves the integrity of the original book, making it a valuable resource for spiritual seekers worldwide․ The PDF is optimized for readability on both desktop and mobile devices․

Cultural and Spiritual Significance

The Bhagavad Gita As It Is holds immense cultural and spiritual value, offering universal life lessons and ethical dilemmas․ Its teachings transcend borders, inspiring global spirituality and personal growth․

Relevance in Modern Spirituality

The Bhagavad Gita As It Is remains a cornerstone of modern spirituality, offering timeless wisdom on mindfulness, self-reflection, and ethical decision-making․ Its universal themes, such as balancing duty and desire, resonate deeply with contemporary seekers․ The text’s emphasis on inner peace and spiritual growth aligns with today’s focus on mental well-being and personal development․ By providing a clear path to understanding life’s purpose, it bridges ancient philosophy with modern challenges, making it a invaluable resource for global audiences seeking meaning and fulfillment in a fast-paced world․

Impact of the Book Globally

The Bhagavad Gita As It Is has left an indelible mark globally, inspiring millions with its universal teachings․ Translated into numerous languages, it has become a spiritual cornerstone for diverse cultures․ Its influence extends beyond religious circles, shaping philosophical thought and personal growth worldwide․ The book’s availability in formats like PDF has further expanded its reach, making it accessible to a digital generation․ As a result, it continues to foster global understanding and unity, bridging cultural divides through its timeless message of love, duty, and self-realization․

The Bhagavad Gita As It Is remains a timeless spiritual guide, offering profound wisdom․ Its availability in English PDF ensures accessibility for global seekers of truth and enlightenment․

Final Thoughts on the Bhagavad Gita As It Is PDF

The Bhagavad Gita As It Is PDF is a invaluable resource for spiritual seekers, offering the original Sanskrit text, precise English translations, and Srila Prabhupada’s insightful commentary․ This edition preserves the integrity of Krishna’s teachings, making it a trusted guide for understanding the Gita’s timeless wisdom․ The inclusion of color plates and original illustrations enhances the reader’s experience, while the commentary provides deeper insights into the philosophical and practical aspects of the text․ This PDF is not only a spiritual treasure but also a comprehensive study aid, ensuring that the essence of the Gita remains accessible and engaging for modern readers worldwide․

Encouragement to Explore the Text

Exploring the Bhagavad Gita As It Is offers a profound journey into spiritual wisdom, self-discovery, and timeless life lessons․ This sacred text, presented in its purest form, provides guidance for navigating life’s challenges and achieving inner peace․ Whether you’re seeking philosophical insights or practical advice, the Gita’s universal message resonates with readers of all backgrounds․ With its accessible English translation and detailed commentary, this PDF edition makes the teachings of Krishna easily understandable․ Embrace the opportunity to deepen your spiritual understanding and enrich your life by immersing yourself in this invaluable text․

Posted in PDF